
Total Cloud Playout
The LiveStreamingCDN Total Cloud Playout platform can be used to generate a 24/7 live-streamed broadcast from pre-recorded video assets. It was designed to help start-up broadcasters, churches, local TV stations, and IPTV/OTT service providers create their own channels without costly and overly complex equipment. Cloud Playout lets you upload your library of videos and schedule them to play back as a live stream 24x7, up to 7 days in advance.
Live Stream Insertion
Total Cloud Playout allows you to switch the playout feed to the live event stream any time during your playout schedule using a simple manual switch. Interrupt your regular broadcast schedule for breaking news, or insert live programming at any point in your broadcast schedule with the push of a button.
Social Media Integration
Social Media Streaming (Facebook, YouTube, Twitter, etc.) is available on all Total Cloud Playout accounts.
LiveStreamingCDN Cloud Playout User’s Guide
Initial Set-Up
Once you sign up for a Cloud Playout account, we build your own system for you. Since this process requires some development and manual configuration, it may take up to 2 business days to set up the full platform. Once it is ready, you will receive an e-mail with your personal account information.

Welcome Page
Before creating a 24/7 broadcast, you will have to upload the content you will be using to generate the live feed. Standard Playout accounts come with 100GB of storage, usually enough for most users, but more storage can be requested if you have a larger volume of content or very high quality files. To begin uploading, visit the View/Upload Videos page and follow the instructions below.
Uploading Videos
Before creating a 24/7 broadcast, you will have to upload the content you will be using to generate the live feed. Standard Playout accounts come with 100GB of storage, usually enough for most users, but more storage can be requested if you have a larger volume of content or very high quality files. To begin uploading, visit the View/Upload Videos page and follow the instructions below.
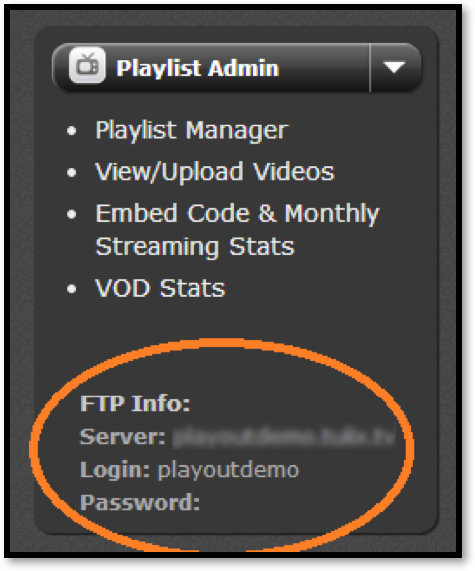
Using an FTP client for video management: Using an FTP client (such as FileZilla ) is the most efficient way to add/remove large numbers of videos at once, uploading videos over 2GB in size, and creating folders to organize your content. With the FTP Info listed on the side bar, sign into the server from your FTP client (a port number is not needed). If your sign-in is successful, you will now see the files on your local computer and those on the server side-by-side.
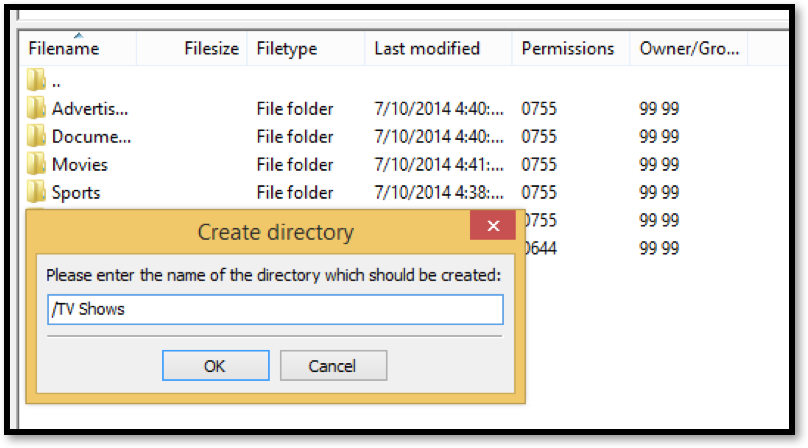
Creating folders using an FTP client (optional): If you have a large number of files and would like to use folders to sort videos for later access, you can do so using your FTP client. Sign into your account and right click on a blank field, then click Create directory. Name your directory and click OK to continue. Your new folder will also appear in the web client, although it may take a few minutes to update. Only create folders in the main directory, not within other folders.
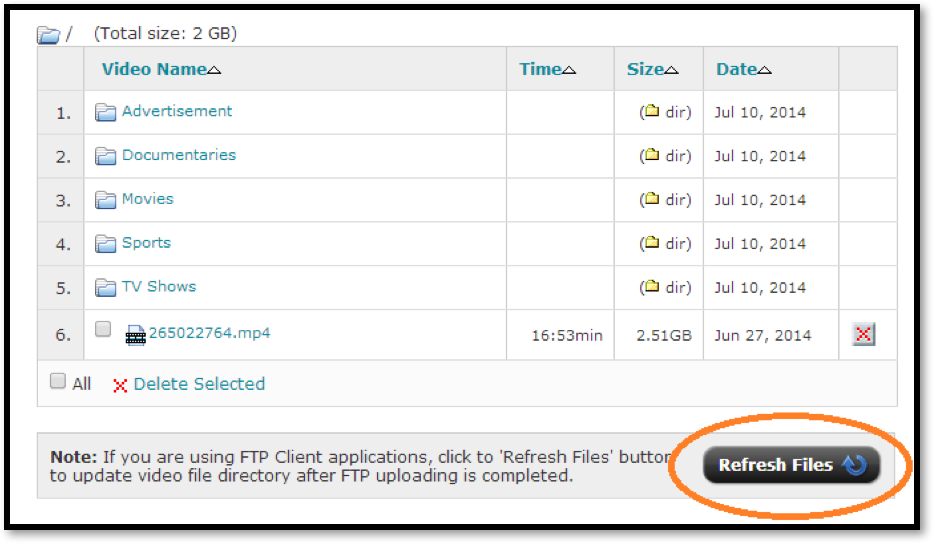
Uploading using an FTP client: You can use your FTP client to upload files larger than 2GB or multiple videos at once. After signing into the FTP client, you will see the files on your local computer and those on the server side-by-side. To upload videos from your computer, simply select them and drag them over to the server, either in the root directory or the folder of your choice. Click the Refresh Files button from your web client to make the changes visible there.
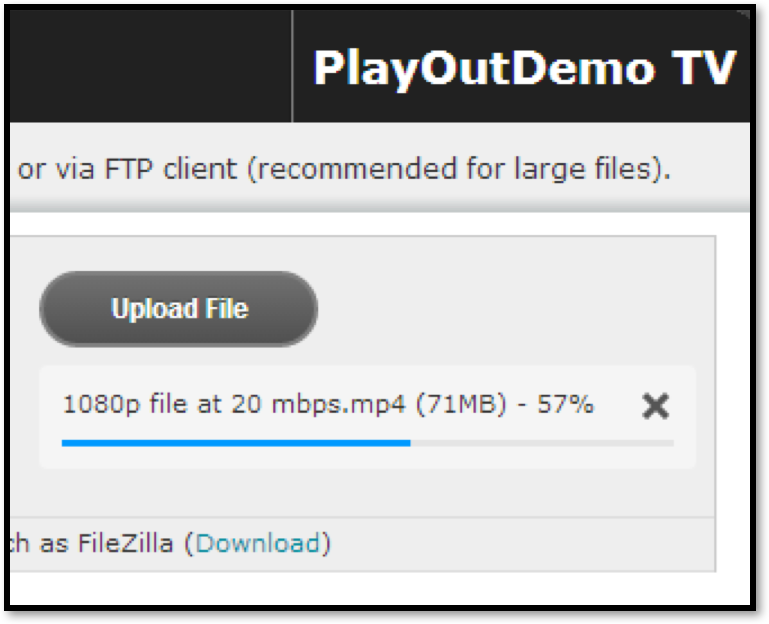
Uploading using the web client: Though we recommend using an FTP client for uploading big files and large quantities of videos, you can also upload single files directly from your web admin portal. Just go to the View/Upload Videos page, navigate to the folder you want to upload the video to, and click the Upload File button at the top right of the page. Navigate to the folder on your computer where your video is and click Open to begin the upload. You will now see a bar showing the upload progress. Do not leave the page or the upload will cancel.
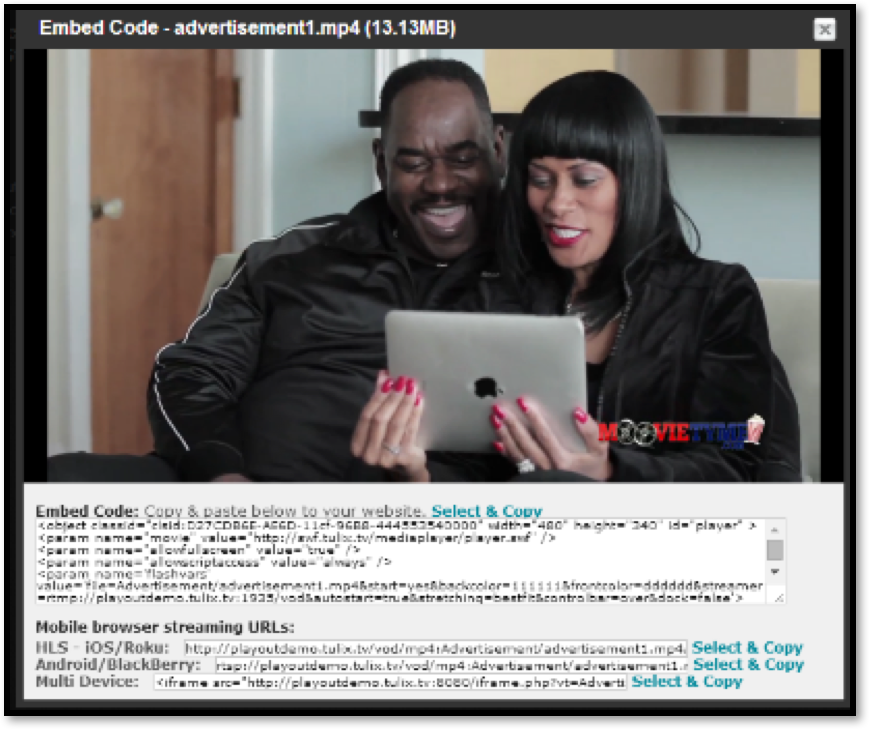
Testing your videos: Uploaded videos should be encoded in MP4 format, using the H.264 for video and AAC for audio codecs. We recommend using the same bitrates and resolutions for all videos to avoid complications. Only use standard characters in your video titles as certain symbols may cause errors (e.g. %, &). Test each video you upload by clicking on it from the web client and making sure it plays back in the preview window. A multi-device compatible embed code and direct links to the video are provided if you wish to use these as VOD assets in addition to insertion into your live feed.
Creating Playlists
Once you have uploaded your video collection, you can begin creating a playlist from the Playlist Manager section of your administration portal. Seven days of advanced scheduling are included with standard Playout systems, although more can be requested if needed.
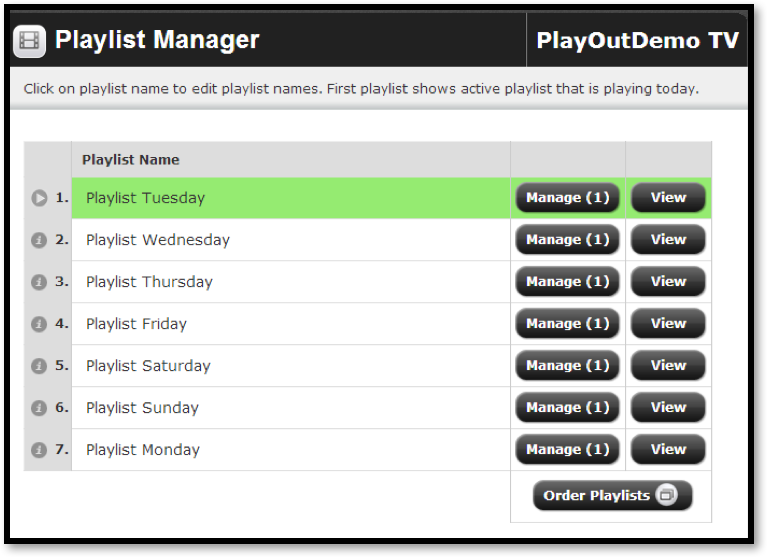
Getting started: Go to the Playlist Manager section, find the playlist that you want to schedule, and click the Manage button to begin creating/editing a playlist. By default, every playlist runs for exactly 24 hours. Typically, the playlists are arranged by the day of the week they play. However, you can assign custom names to playlists by double clicking on their title. You can also change the order in which they play using the Order Playlists button.
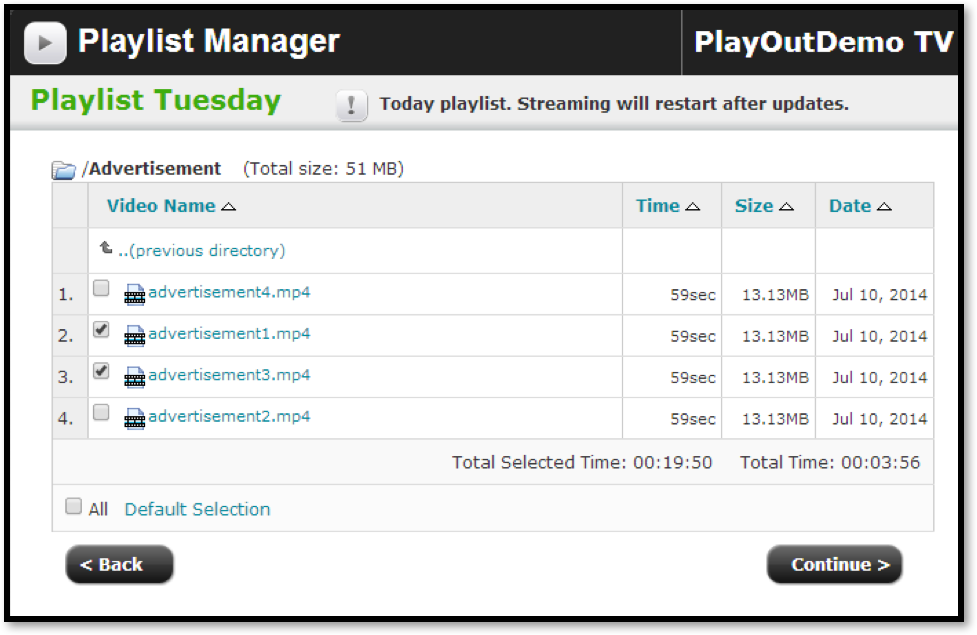
Managing a playlist: Click the Manage button to modify the files within a playlist and change the order in which they play. You will see a list of the videos previously uploaded to the system via the FTP and web clients. Now, select the files you want to add to your playlist using the checkboxes to the left of the titles. You can navigate between folders without losing your selections, but be sure to use the (previous directory) option to switch directories, not the Back button, which will take you to the Playlist Manager page.
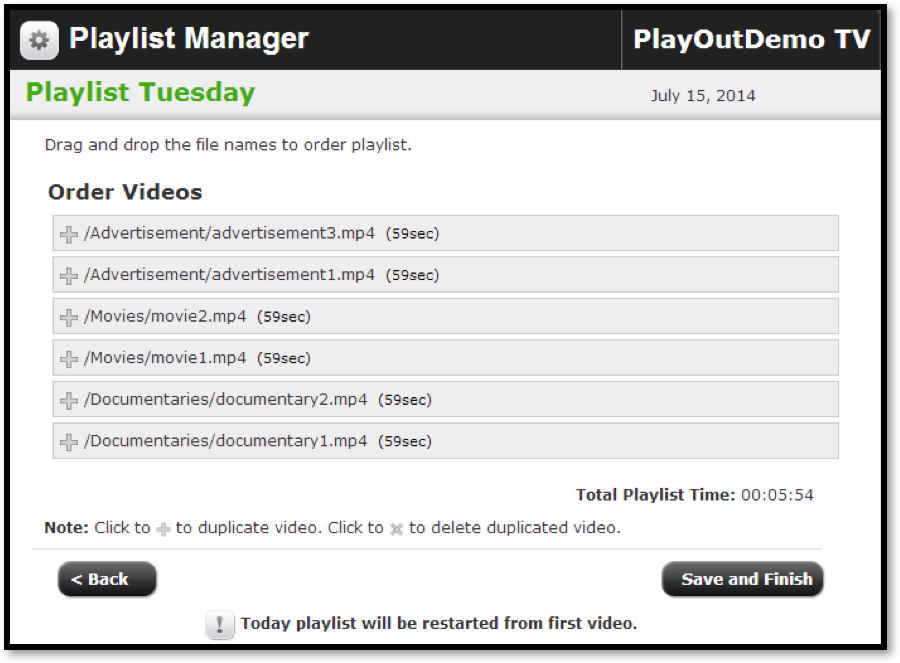
Arrange the video order: Once you have selected all the videos you wish to use, click Continue. You will now see a list of all the files sorted from top to bottom. The order in which they appear is the order in which they will play out in the generated live stream. Drag and drop files to change their position in the playlist. You can also see the Total Playlist Time, the sum of the duration of all videos. This should equal 24:00:00 for seamless playback. To insert a file in multiple sections (e.g. re-using an advertisement), just click the plus (+) symbol to the left of it for each additional use and drag the copy to its desired position.
Once finished, click Save and Finish to confirm the playlist changes. If the playlist being modified is currently running, it will start from the beginning.
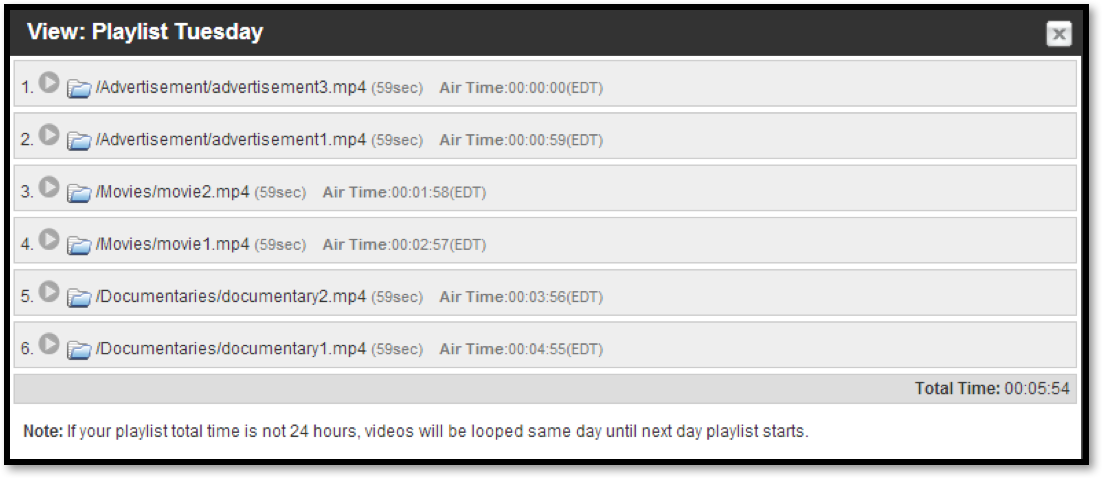
View air time and manage playout feed: Once you have created your playlist, go back to the Playlist Manager page and click on the View button next to it. You will now see a list of the files scheduled to play back in the playlist and the time they will appear on the live feed (the Air Time). You can also make your generated Playout feed start from a specific file by clicking the play button next to it. This is useful if you want to catch up to scheduled time after being forced to restart the Playout feed due to a last-minute playlist change or issue with a file.
Important Notes:
1. Playlists under 24 hours will loop until the next day begins. That means a playlist with only 8 hours of content will play back three full times before switching to the next day’s playlist. Unless this kind of looping is desired, we recommend making the playlist duration exactly 24:00:00.
2. Playlists longer than 24 hours will simply cut off at the end of the day. So a playlist that is 25 hours long will have the last hour worth of content removed, with the Playout feed switching to the next day’s first file.
3. Modifying the playlist that is currently playing will cause it to restart from the beginning. We do not recommend changing a playlist that is currently live unless absolutely necessary. In those cases, you can use the View button next to the playlist to find the file closes to the current time and restart the Playout feed from there. However, this will cause interruptions for viewers.
4. Non-standard characters in titles and corrupted video files can cause errors in playback that will not recover automatically. We recommend testing each video that you upload by clicking on it from the web client and watching it briefly. Try to use only numbers and letters from the basic Latin alphabet and avoid special characters (e.g. $, %, &). Hyphens and underscores are alright.
5. We strongly recommend using consistent bitrates and resolutions for all your files. Sudden spikes in bitrate or changes in the resolution between files could cause the stream to malfunction for certain users, which will lead to confusion and a difficult troubleshooting process.
6. Recommended codecs are H.264 for video and AAC for audio for maximum compatibility.
Publishing Your Playout Stream
Once all of your playlists are configured and you are ready to start publishing your 24/7 live stream to a global audience, navigate to the Embed Code & Monthly Streaming Stats page. Here, you can preview the generated live feed, see real-time viewers, access past statistics, and embed the stream into websites and applications.
Embedding a stream: The Cloud Playout system automatically generates an embed code for a player that can be inserted into any webpage. Find the Multi-Device iframe Website Embed Code and copy it into the code of your site to insert the player. This player will work when accessed from all major browsers on just about any device (including mobile). You can adjust the size of the player to fit your website by changing the height and width parameters within the code.

The stream can also be inserted into custom applications or personalized web players using the direct streaming paths below the embed code. The RTMP (Flash), HLS, and RTSP links are provided and ensure compatibility with just about any devices if used correctly.

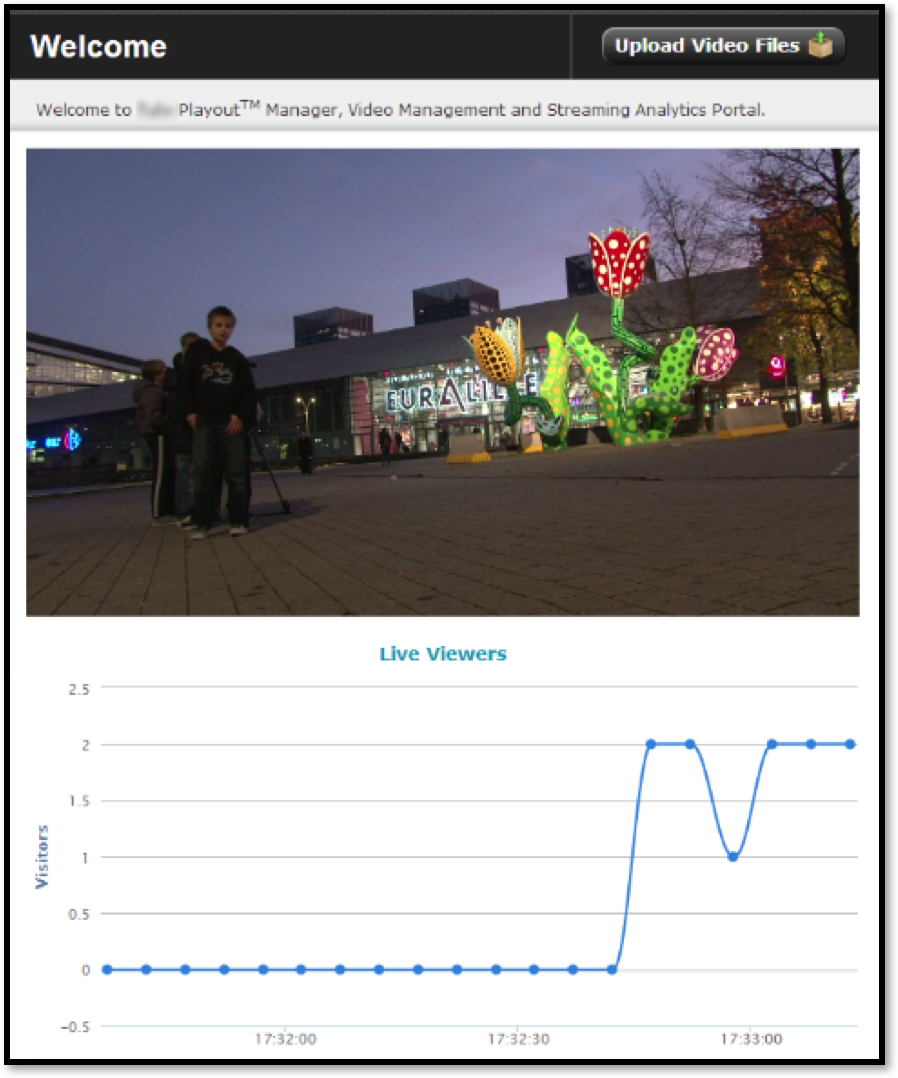
Viewing statistics: A preview web player and viewer graph that updates in real-time can be seen upon signing in and by clicking on the logo at the top right or the Home button on the top left of the admin page. For more detailed monthly stats about the live feed, including bandwidth usage, total hits (the number of times someone tried to load your stream), and unique users (how many individual people consumed your content), visit the Embed Code & Monthly Stats page. If you are using uploaded files as individual VOD files (not just as part of the playlists that compose the Playout feed), you can see aggregate stats for viewership of all videos combined from the VOD Stats.
Partners and Solution Providers